Sunday, January 23, 2005
No Sew Hem
Click images for larger view
Begin with a provisional cast-on (shown here in dark purple) and a needle size one size smaller than will be used for the rest of the piece. In my case, the hem facing is worked in US #4 needles and the rest of the hat will be worked in US#5.
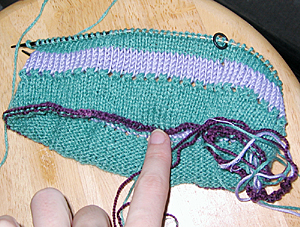
Knit to length of hem. I like at least an inch hem or more. In my experience, a hem that is too short will flip around unattractively.
When you've reached your hem length, work in such a manner as to have a purl row on the public side. Working flat, you will work a row of knit on the wrong side. Working circularly, you will work a row of purl stitches on the public side. This is your fold point
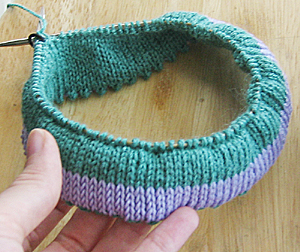
Another option, shown above, is to work a picot edging. This is achieved by working:
*YO, K2tog* across a flat row (wrong side) or *YO P2tog* across a round (public side) for circular knitting.
Switch to your larger needles and begin working the outside of the piece in whatever manner prescribed. Work to the same length as the hem facing

Now is an excellent time to weave in any ends you have.
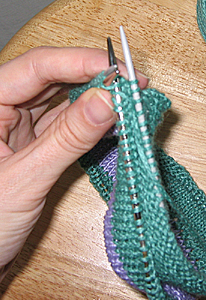
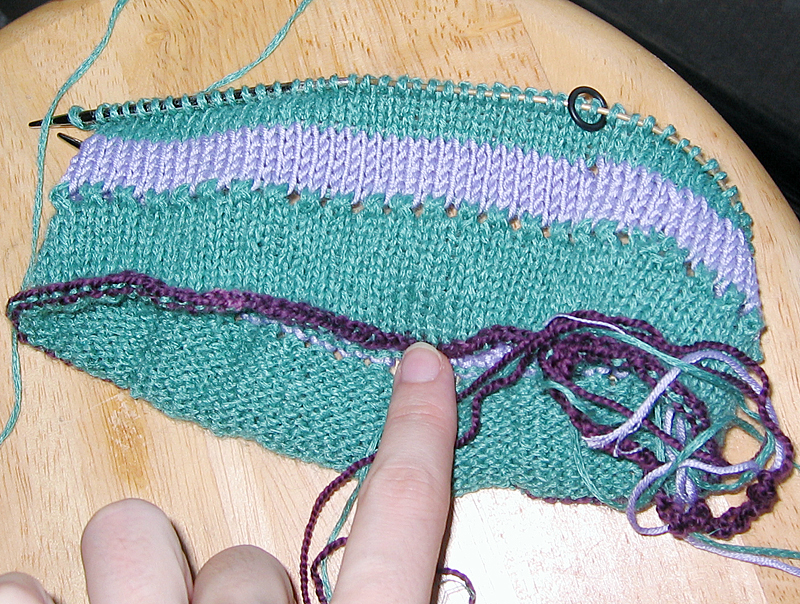
Pull out your provisional cast on and move those stitches to a set of needles of a much smaller diameter (image above).
Fold along the fold edge (purl row) and align both sets of stitches.
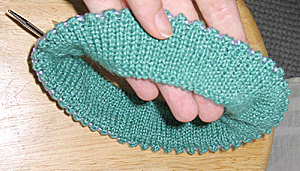
Put your working needle through a stitch on each of the needles and knit the two stitches together (image above).
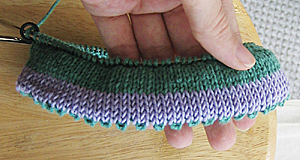
Work across the entire row or around the entire round until you've closed the hem (image above).
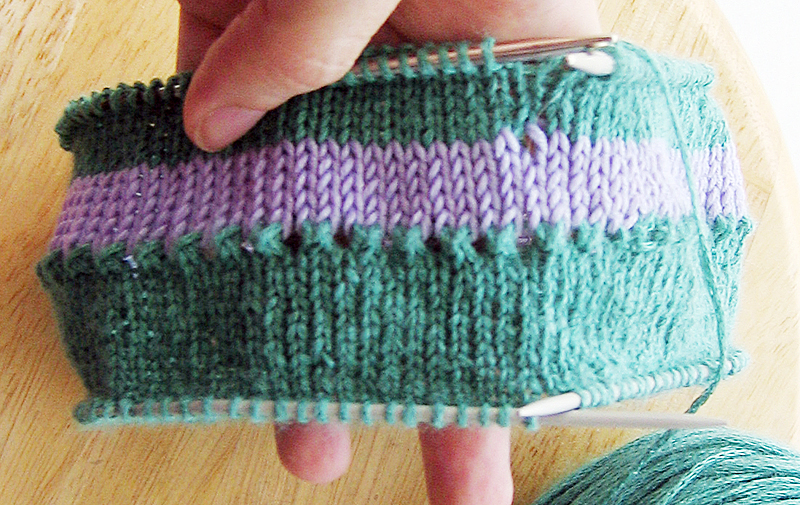
Pretty on the wrong side
Pretty on the public side.
If you wish to work your hem in a different color from the outside of the piece, work the first row of the hem in the color used on the outside of the hat so that when you knit the rows together, the hem color doesn't peak through.
Make sure you've properly aligned the facing and outside stitches. If they aren't perfectly aligned your hem will be skewed and feel wonky to the wearer.
If you want a casing for a drawstring, work the piece in the round but work a portion of the hem facing back and forth to create an opening.
Consider working this method at the hem of a sleeve. A complimentary color peaking through would be really striking.
If you are working a hat in wool, consider making your hem facing in a yarn that doesn't itch to protect the wearer's forehead. Make the hem extra long for better coverage
Begin with a provisional cast-on (shown here in dark purple) and a needle size one size smaller than will be used for the rest of the piece. In my case, the hem facing is worked in US #4 needles and the rest of the hat will be worked in US#5.
Knit to length of hem. I like at least an inch hem or more. In my experience, a hem that is too short will flip around unattractively.
When you've reached your hem length, work in such a manner as to have a purl row on the public side. Working flat, you will work a row of knit on the wrong side. Working circularly, you will work a row of purl stitches on the public side. This is your fold point
Another option, shown above, is to work a picot edging. This is achieved by working:
*YO, K2tog* across a flat row (wrong side) or *YO P2tog* across a round (public side) for circular knitting.
Switch to your larger needles and begin working the outside of the piece in whatever manner prescribed. Work to the same length as the hem facing
Now is an excellent time to weave in any ends you have.
Pull out your provisional cast on and move those stitches to a set of needles of a much smaller diameter (image above).

Fold along the fold edge (purl row) and align both sets of stitches.
Put your working needle through a stitch on each of the needles and knit the two stitches together (image above).

Work across the entire row or around the entire round until you've closed the hem (image above).

Pretty on the wrong side

Pretty on the public side.
Things to consider:
If you wish to work your hem in a different color from the outside of the piece, work the first row of the hem in the color used on the outside of the hat so that when you knit the rows together, the hem color doesn't peak through.
Make sure you've properly aligned the facing and outside stitches. If they aren't perfectly aligned your hem will be skewed and feel wonky to the wearer.
If you want a casing for a drawstring, work the piece in the round but work a portion of the hem facing back and forth to create an opening.
Consider working this method at the hem of a sleeve. A complimentary color peaking through would be really striking.
If you are working a hat in wool, consider making your hem facing in a yarn that doesn't itch to protect the wearer's forehead. Make the hem extra long for better coverage


<< Home