Using the K-Tel knitter
Introduction
I am not an expert K-Tel knitter. I have a passing acquaintance with it and a set of instructions. Since instructions are hard to come by and I don't want to break any copyright laws, I'm doing up my own set of instructions for those of you who have come upon these odd tools and wish to know what to do with them.
As a brief editorial, I'd like to give my thoughts on these. Firstly, the technique and resulting fabric is more Crochet like than Knit like. If you are hoping that this will teach you to knit with one needle, you may be disappointed. If you are already a crocheter, you will probably find this method more cumbersome, slower and harder to make look neat than the traditional crochet technique.
To distill my sentiments down to a single thought, I would say that I think there is a really legitimate reason why K-Tel knitters have not stood the test of time. They aren't any better than existing methods for turning yarn to fabric.
Ok, that's simply my own opinion and worth less than the bandwidth consumed to view it. Now to the instructions.
K-Tel Basics
Click images for larger views

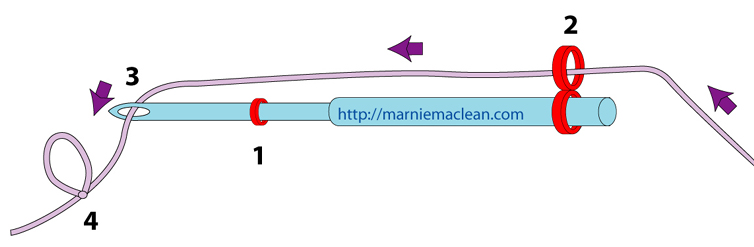
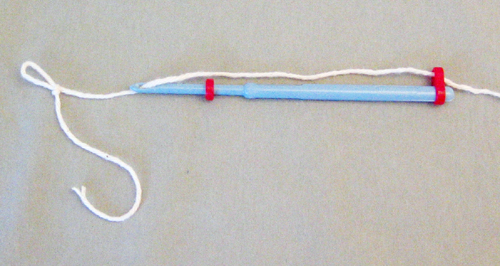
The K-Tel knitter is a plastic stick with a large eye at one end.
I've named the parts of the needle as follows:
- A: The Eye
- B: Gauge Collar: Note, this is the only movable part on this tool
- C: Yarn Guide
All K-Tel projects will start the same way.
- Begin by setting your gauge by sliding the Collar up or down. In my experience, it is easier to set a very loose gauge to start with, especially with yarns that don't slide easily.
- Draw yarn through the Guide at the base of the needle.
- Thread yarn through Eye of needle
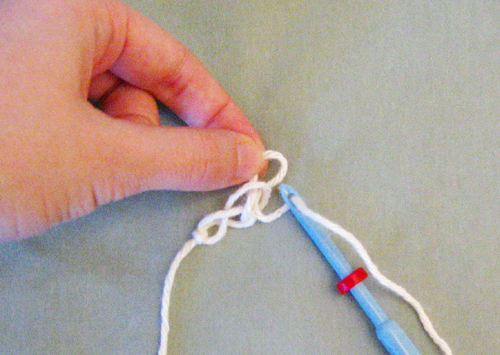
- Make a slip knot at the end of the yarn.
Hold the needle so that the Guide is positioned up, your fingers are under the yarn running along the needle and the eye is facing you. The hardest and most important thing to remember is DO NOT ALLOW THE NEEDLE TO ROTATE. You must continually hold the needle in this manner or you will not be able to complete your stitches.
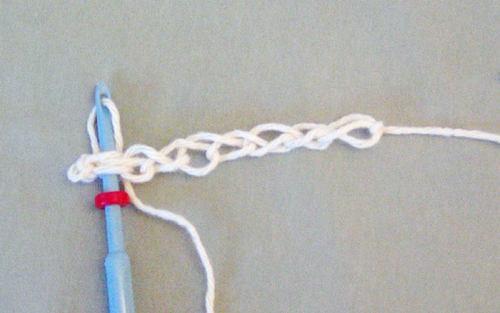
The First row
Your first row will be worked in a manner that results in a chain like those created in crochet.
Following the directions above, thread your K-Tel knitter. Make sure you make a slip knot at the end of the yarn.

Hold the needle so that the yarn flows over your fingers, and the Guide is facing up. Do not twist the needle while you work.
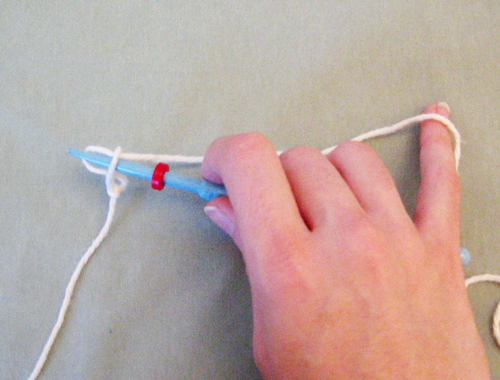
Hold the slip knot and insert your needle into the loop, all the way up to the Collar
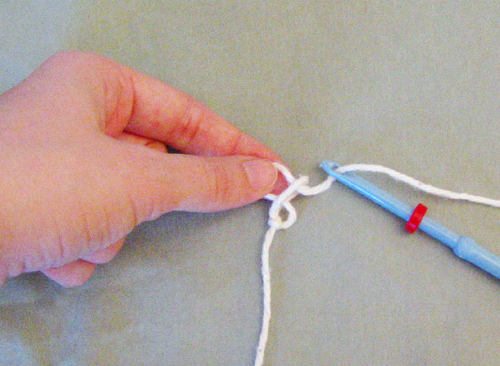
With your left hand hold the loop made by pushing the yarn through the slip knot. Pull the needle out, maintaining your hold on this new loop.
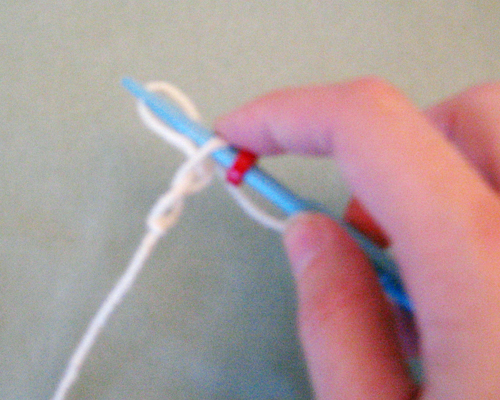
Insert the needle into this new loop. Remember to put it up to the Collar.
Repeat the process of holding the loop while pulling out the needle.
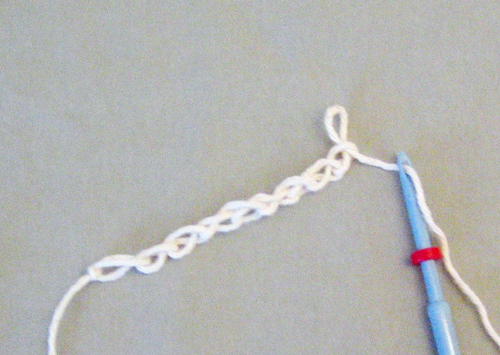
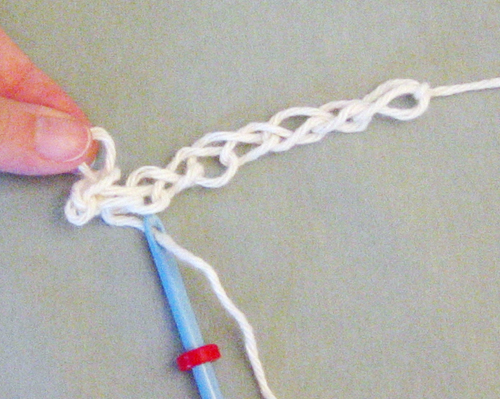
Continue in this manner as many times as necessary to get to the number of stitches you want. Then, make one more loop.
Second Row
K-Tel knitting is worked left to right, so you will need to turn your work after each row.
Insert your needle in the second stitch and then through the last loop made in the previous row.
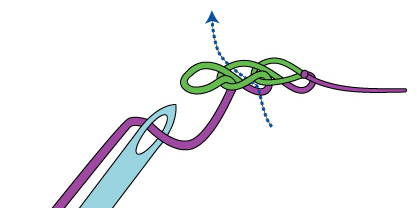
You should insert your needle into the stitch by going under the V shaped portion of each stitch. You can click the image for a larger view.
It should look like this. Your needle is through the second stitch from the needle and then the free loop.
Remember to push the needle through these two stitches, all the way to the Collar.
Hold the loop made by pushing the needle through. Pull the needle out as you did in the previous row. Repeat this in each stitch that follows, pushing the needle through the next stitch and through the last free loop made.

Do this to the end of the row.
Make one additional loop after completing all the stitches.
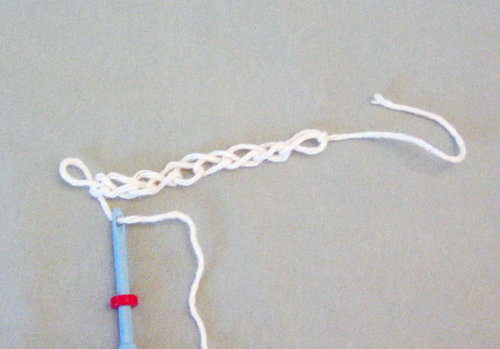
Because the first row is made so loosely, it will appear fairly sloppy. Don't let this discourage you, you can tighten up your gauge one you get a better handle on the process.
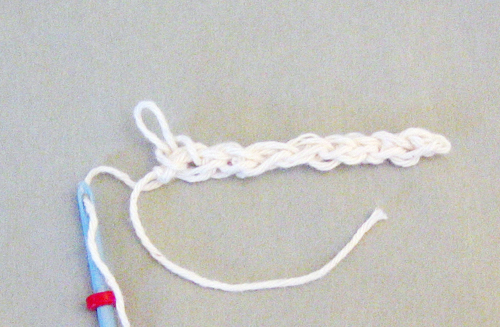
Turn your work.
All subsequent rows are worked the same as row two.
See these instructions on their own page.