All excel posts

Most pictures may be clicked to enlarge.

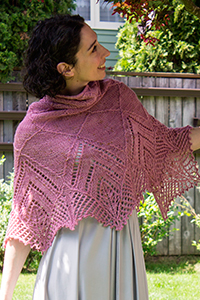
This is the last in a 3-part tutorial covering this spreadsheet, and one of several tutorials on using Excel for designing. There are two previous tutorials in this particular series that combined, give you all the info you need to understand the various fields in the spreadsheet. And that spreadsheet? It's got the raw numbers needed to make this little shell.

NOTE: The attached spreadsheet is just a sample and contains measurements that may be useful but which may not meet the standards for some publications. You are welcome to use what I have for your own design purposes but it'll be you who has to ultimately support any patterns written from it, so do your research first.

Special notes:
I've used Ysolda's measurement chart as a reference for many of the basic sloper measurements.
I'm using Amy O'Neill Houck's tutorial on estimating yardage to create my yardage estimation formulas.

The goal

In the two previous tutorials, we learned about

  • Rounding
    • Round to a whole number
    • Round to the nearest Even or Odd number or Round, Round Up or Round Down
    • Round to a multiple
    • Round to a multiple plus
  • Intro to IF statements
  • Evenly spacing shaping
    • Every X rows Y times
    • Next and every X rows Y times

In this tutorial, we'll cover

Most pictures may be clicked to enlarge.

This tutorial picks up where the last tutorial left off and uses the formulas found in this spreadsheet. This tutorial can stand alone but may reference Excel skills covered more fully in previous Excel tutorials. If you haven't used the program much, you may want to review these other tutorials.

NOTE: The attached spreadsheet is just a sample and contains measurements that may be useful but which may not meet the standards for some publications. You are welcome to use what I have for your own design purposes but it'll be you who has to ultimately support any patterns written from it, so do your research first.

Special notes:
I've used Ysolda's measurement chart as a reference for many of the basic sloper measurements.
I'm using Amy O'Neill Houck's tutorial on estimating yardage to create my yardage estimation formulas.

The goal

In the last tutorial, we learned about

  • Rounding
    • Round to a whole number
    • Round to the nearest Even or Odd number or Round, Round Up or Round Down
    • Round to a multiple
    • Round to a multiple plus

In this tutorial, we'll cover

In the final tutorial, we'll cover

  • Calculating finished garment measurements
  • Calculating yardage based on a sample
  • Putting your numbers into MS Word

Most pictures may be clicked to enlarge.

Since the last tutorial on using Excel for pattern writing, I've refined a lot of how I manage my spreadsheets. I've been playing around with different formulas in Excel to find ways to make pattern writing easier. You know what that means, another tutorial.

Download the spreadsheet and play along at home. I'll be making references to various parts of the spreadsheet so go ahead and open this baby up.

NOTE: The attached spreadsheet is just a sample and contains measurements that may be useful but which may not meet the standards for some publications. You are welcome to use what I have for your own design purposes but it'll be you who has to ultimately support any patterns written from it, so do your research first.

Special notes:
I've used Ysolda's measurement chart as a reference for many of the basic sloper measurements.
I'm using Amy O'Neill Houck's tutorial on estimating yardage to create my yardage estimation formulas.

The goal

So, like last time, I'm just giving you instructions for a basic shell. All the same formulas can be used to build sleeves. Just use this as a starting point.


A rough schematic of what we are shooting for

Excel for Charting Simple Cables

| 11 Comments

While on Ravelry, the other day, the topic of charting cables came up and it occurred to me that I've covered using Excel for; colorwork, pattern writing, simple lace charts, and complex lace charts. But what's this? No cables? Have I been smokin' the wacky tobacky?

Now, cables can get pretty complicated, and there will be times when your design, just can't be visualized with the tools built into a spreadsheet program, but for pretty standard cables, I think I can cover what you need here.

As always, I start by formatting my page.

I've covered this in previous episodes, so browse those, if you aren't sure how to change the size of cells to be more knit stitch shaped.


Our first cable is going to look like this.

This chart would read, if written out:

  • Row 1: P2, *k4, p2* repeat from * to * to end of row
  • Row 2: Knit the knits and purl the purls
  • Row 3: P2, *slip next 2 stitches on cable needle and hold in front, k2, k2 from cable needle, p2* repeat from * to * to end of row
  • Rows 4&5: Repeat row 2
  • Row 6: P2, *slip next 2 stitches on cable needle and hold in back, k2, k2 from cable needle, p2* repeat from * to * to end of row

So those diagonal lines simply represent the stitches being crossed. They may not look exactly like other charted cables, but they convey the intention and the approximate look of the cable.

Using Excel for Complex Lace Charts

| 8 Comments
Cross posted at the Create Along

This tutorial is the 4th in my set of Excel tutorials. You can see the others here:

And, if you happen to have any tutorials of your own, please let me know.

In my last tutorial, I cover creating simple lace charts in Excel. Today, we'll approach a more complex lace pattern and introduce the no stitch. The lace pattern, I'll be covering, is most of the Peri's Parasol pattern I used in Chapeau Marnier.

What is a "no stitch"

More than any other single question, I get this most of all and I think it boils down to a lot of over thinking from the knitting community. Often, people ask if it means a stitch should be slipped. A no stitch, in fact, simply means there is no stitch in that spot. Some lace and cable patterns, change stitch count from row to row. The chart can be made a little more intuitive by distributing the stitches in a logical manner and spacing them with "no stitch" blocks. Generally, when using a "no stitch," one should format it in such a way that it can easily recede from focus. I usually shade mine in gray or black.

Format your spreadsheet

I begin, as always, by adjusting my cells so that they are approximately stitch like in proportion. See the tutorial on colorwork for more information about this step.


Select all the cells, go to the FORMAT menu and choose CELL


Set the alignment to be centered both horizontally and vertically. This will ensure your symbols are centered. Set your font size and add borders to all your cells.


Share this page

About this Archive

This page is an archive of recent entries in the excel category.

create along is the previous category.

lily is the next category.

Find recent content on the main index or look in the archives to find all content.

August 2016

S M T W T F S
  1 2 3 4 5 6
7 8 9 10 11 12 13
14 15 16 17 18 19 20
21 22 23 24 25 26 27
28 29 30 31      

Find Me Here

  • rss
  • facebook
  • twitter
  • flickr
  • goodreads
  • google
  • linkedin
  • pinterest
  • ravelry
  • youtube

Featured Patterns